Monday 6 August 2012

Fixing Stage COMPLETE :)

Hi Guys,

Sorry for the belated update, been so these few months busy..
Fixing stage was completed on 19 July, we had our private inspector on site.  He found some minor errors in sections of the house. We raised this concerns with our Building supervisor and we arrange to a meeting. We  meet our  Building supervisor on site and handed our Private inspector report to him. He listen to our concern and he would follow up on error and have these sorted. 

Here are the long awaited pictures below:


Here is the our facade rendered (first coat only)

Our Front door 


Front door after being stained painted 


Our newly installed kitchen cupboards


Pantry Cupboards


Our Special Void 

Our PCI inspection is this coming up on 13th of August :) Cant believe is happening so fast.
We would appreciate any advise during the inspection day?? such as what should we be long out for?? any comment or suggest would be a great value :)

Cheers,
Karma888


Sunday 17 June 2012

Lock up stage Completed!!!

Hey Guys :)

Lock up stage has been completed. We were so excited to visit over the weekend and to see our facade is nearly complete (still needs to be rendered).We cant wait to see the final product.  My DH and I were very pleased :)  Once, again PD has done a Fantastic Job :)

Here it is finally! Our long awaited pictures of our facade.  We have dreamed of finally seeing the images of our once 2D paper based facade to the real life image.


The plaster has also been delivered. Fixing up stage should begin very soon. We will keep you guys updated!!

Cheers,
Karma888

Monday 7 May 2012

Frame Stage Complete :)

 Hey guys,

Good news, the Frame has been completed on 30th of April. We have been so amazed how fast construction has been, even the rain these past few days has not slowed construction.  Although I did hate getting my shoes muddy and finding muddy trails in our house. As you can see in the picture some muddy trails from the front of the house.
.
 Here's the angle view of  the facade.
 The view from the front door.


We had our private inspector to inspect the frame and overall he was very pleased with the job. He could only find minor defects. I contacted my SS about the minor defects and the next day he taken swift action and had a carpenter rectify the minor defects. Our SS has been so great, he listens to our concern and taken appropriate actions. Two thumbs up, for Great work :)

I'll keep you guys update, I will post soon....

Cheer,
Karma888


Wednesday 18 April 2012

CONSTRUCTION has began!!!

Hello readers!,

We are pleased to finally announced.....CONSTRUCTION has began on our lot!!!
Construction has began on 2nd of April. Here are the first pictures that I had taken of our site being cleared and leveled.

  
PRE-SLAB (Boxing Stage)

Since then the boxing stage (pre-slab) has been completed. During this stage we had private inspector to inspect to ensure all measurements are correct and to ensure the work was up to Australian standards. Our inspector was pleased at this point only picking up one minor error a tear in the plastic. Which was amended quickly, to ensure no moisture would seep through. Here are some pics i have taken during the boxing stage.

This is the front portico.

 The Garage


The rear view of our house.


SLAB Stage Complete! 
My DH and I are so amazed in how fast the progress of construction has gone. It has only taken 2 weeks for the site to leveled and finally the concrete to be poured.
The Slab was poured on 13th of April. Here are pictures of the freshly new concrete just been poured.
 View of the Garage

 Our Master bedroom and the Portico

Dining room and the Alfesco at the rear end.


Here the view from the angle showing the portico and the Garage.

I meet our SS 16th April to discuss how the process of our house. I was very pleased how construction was going so far, speedy but work was up to standards.

Beginning of the Frame

Yesterday Our private inspector inspected the finished slab. When he inspected the where trades starting to wok on the frame. Our inspector could not find any fault with the finished slab, all measurements were correct, no cracks, no faults! This was fabulous news :)
The concreting firm and  PD  has done a Fabulous job :) we are so pleased, that the foudations of our house is accurate. 

 Here are some pics of the start of our Frame:


 We can't wait to see the following progress...

Cheers,
Karma888

Sunday 18 March 2012

Our ALTERED house plan**

Hi Guys,

As previously mentioned we have slightly altered the Berkley house plans. My DH and I drove to the display house (which was 1hr drive) in order to visionalize the changes. He also brought with him his handy measuring tape.  While i walked around the house imaginating it was our home, my hubby worked hard on accurately measuring windows, future plaster walls, the opening for the void, etc. Ensuring the correct measurement will be written on the final house plans. 


 Changes made to the house plans:
- Re-design Master bed room to include a flush wall to the front facade (making it square) 
- Door to Master En-suite
- Extended Dining and Family section to provide a square rear section of the home 
- Re-located bed 4 robe and door
- Re-design floor plans to add a Study /Living room 
- Void opening from Study/Living to  dining  room
- Altered window size for Study/Living room
- Extended Laundry Bench top.

 Cheers,
Karma 888

Thursday 15 March 2012

Near construction..finally

Hi Guys,

We went to our lot over the weekend and to our surprise the external tap at the front yard has been put up :). We were very excited at the thought of our house finally beginning to build.  So here is the picture of our new golden tap, lol :)


Well keep you guys update on any progress..

Cheers,
Karma888

Visit our Thread: http://forum.homeone.com.au/viewtopic.php?f=31&t=53564&p=825496#p825496

Sunday 11 March 2012

**COLOUR & ELECTRICAL SELECTIONS**

Hi Guys,

Sorry for not blogging for a while. Here it is finally my DH and I  selections that we have chosen during our colour and electrical appointment.

COLOUR SELECTIONS!!!

External Selections:
Bricks: Brushwood
Rendering of the front facade: Camel Train
Colourbond Roof: Woodland Grey
Fascia, Gutter & Downpipes: Woodland Grey
Windows: Woodland Grey
Garage : Woodland Grey 
Front Door:  Madison Entrance PMADSL 111(front door $584.00) PMAD 111 (sidelight $614.00) 
Glass Glazing: Desert Sand  (included in the front door price)
(NO PIC AVAILABLE)
Stained type: Anitque Walnut $198 + $99.00  
(NO PIC AVAILABLE)
Door Handle: Nexion Vision Summit lever $165.00
Internal selections
Internal wall colours : Spring Sounds
(NO PIC AVAILABLE) 
 
Here is the Updated price on Tiles Selections $8,718 - $1,608.00 (carpet allowance)

Master En-suite & Bathroom selections
Caesar stone bench top in the Kitchen, W.I.P, bathroom & ensuite:  Ice Snow
Kitchen, W.I.P,  bathroom & ensuite cupboards: Milano Walnut
Master en-suite basin: Pisa Slim Counter top basin (not a upgrade part of promotion)
Master basin tap ware:  Raymor Torino Basin Pillar mixer (not a upgrade part of promotion)
Bathroom basin: Valentino basin & Basin tap ware: Kludi Logo Basin Mixer $202.00
(NO PIC AVAILABLE)

Shower mixer to thee Master and Bathroom shower: Caroma Aqua Wall Mixer $192.00

Kitchen Selections: the followings are not upgrades these are part of  style Republic selections


Total cost colour upgrades $10,176.00

ELECTRICAL SELECTIONS!!
We have manage to write down some of the following prices of our electrical selections. Hope this helps anyone :)

Ceiling light x30 ($50 each)
Single power points x6 ($42 each)
Double power points  x28 ($45 each)
Water proof double GPO x4 (112 each)
Four Power points  x12 ($83 each)
Junction Box (pillar)x 2 (? each)
Junction box (brick work) x 4 ( ? each)
Exhaust Fans x2 (208 each)
Telephone point x2 ($80 each)
Television points x5  ($58 each)
Door bell x1  ($170 each)
Digital Aerial x1   ($360 each)
The total of cost of the following electrical selections $3,679.00 (excluding alarm system)

Alarm system  x6 sensors ($1,566.00)

Cant wait until contructions begins on our land :)
We will keep you guys updated  for any progress.....

Cheers,
Karma888 

 Visit our Thread: http://forum.homeone.com.au/viewtopic.php?f=31&t=53564&p=825496#p825496

Thursday 9 February 2012

Our brand NEW* FACADE!

Hi Guys,

We thought we would post up our brand NEW*  "Oakland"   facade by PD. This facade is not yet available to be viewed online nor does PD  have any available pamphlets/pictures available on it. This facade has just been released by PD earlier this year. So ATM my husband and I have to be content to view our facade as black and white paper based copy and to let our imagination do the work, lol.

Here is photo shop edited version of our facade :)


We have decide not add any colours (using photoshop, paint programs etc) and leave it black and white  due colours in those progrmas would not be accurate or do justice to the facade, LOL!  I know looks plain ATM but should look great in real life with the colours that we are going to select during our colour appointment 13/feb/2012.

Can't wait till the real thing is up :)


Cheers,
Karma888.

Visit our Thread: http://forum.homeone.com.au/viewtopic.php?f=31&t=53564&p=825496#p825496


Tuesday 31 January 2012

Tiles have been selected :)

Hi Guys,

We have selected our tiles. It was quite a simple task selecting our tiles. We immediately knew what we wanted, something simple that would go with our furnishing and internal colours. So instead of  spending 3 half Hrs, it only had taken 2 hrs due to waiting for pricing and making additional tilling to en-suite and bathroom areas (walls).

The tile selected is below : )


It's a bit hard to see due to reflection but the tile is not completely white it has a very mild green pattern to it (not red). We choose a white grout to make the tiles stand out. The tiles size is 400mmX400mm.

We decided to tile our entry house, so you could imagine the cost of the non standard areas. We decided not to upgraded and stick to standard tiles but we did choose gloss tiles so it was additional cost.
 
Here are the prices below:
Tiling to Standard areas (entry, kitchen, W.I.P, family, dinning, bathroom, ensuite, laundry) $575.46
Bathroom shower base $4.64
En-suite shower base $9.30
Tiles to NON-standard areas (theater, theater pass, study, rear hall, Master bedroom, bed 2, 3 & 4) $7293.69 this is approx price without PD taken out the difference of Carpet allowance. So hopefully it will greatly reduce, both fingers crossed!!!! :)
En-suite shower walls & vanity walls $44.35
En-suite skirting $6.96
En-suite extra wall tiling $198.14
Bathroom shower walls, vanity wall, bathtub wall & laundry wall $41.76
Bathroom toilet & laundry skirting $12.01
Bathroom extra wall tiling $152.60

>>>One main thing that made us worry & so stress is that the floor plans that we altered and updated during the tender appointment was not presented during our tile appointment!!<<<<

We had altered our floor plans two weeks prior (7/2/2012) to our tender appointment (23/2/2012). However, our Sales consultant did not send the updated floor plans. (What a waste of time of going to display house to see our Sales consultant which was 1 Hr drive from our place!!!!)  So during the tender appointment the floor plans had to be re-drawn and we were only allowed to view the external changes.  We were not able to view the internal changes and were only advised that the changes had occurred.

During our tiles appointment (31/2/2012), we were told that our floor plans was still in the process of being drawn and should be done that afternoon. Therefore, the floor plan that tiles consultant had shown us was our previous floor plans (incorrect). So we had to work with our previous/incorrect floor plans during our appointment. Were extremely worried that something will go horrible wrong with the floor plans as we have not even viewed the changes to ensure they are correct.  Our colour & electrical appointments are coming up and were worried that our altered plans will not be updated by then.

We will keep you guys posted....

Cheers,
Karma888

Visit our Thread: http://forum.homeone.com.au/viewtopic.php?f=31&t=53564&p=825496#p825496

Monday 23 January 2012

Tender appointment Complete!

Hi Guys,

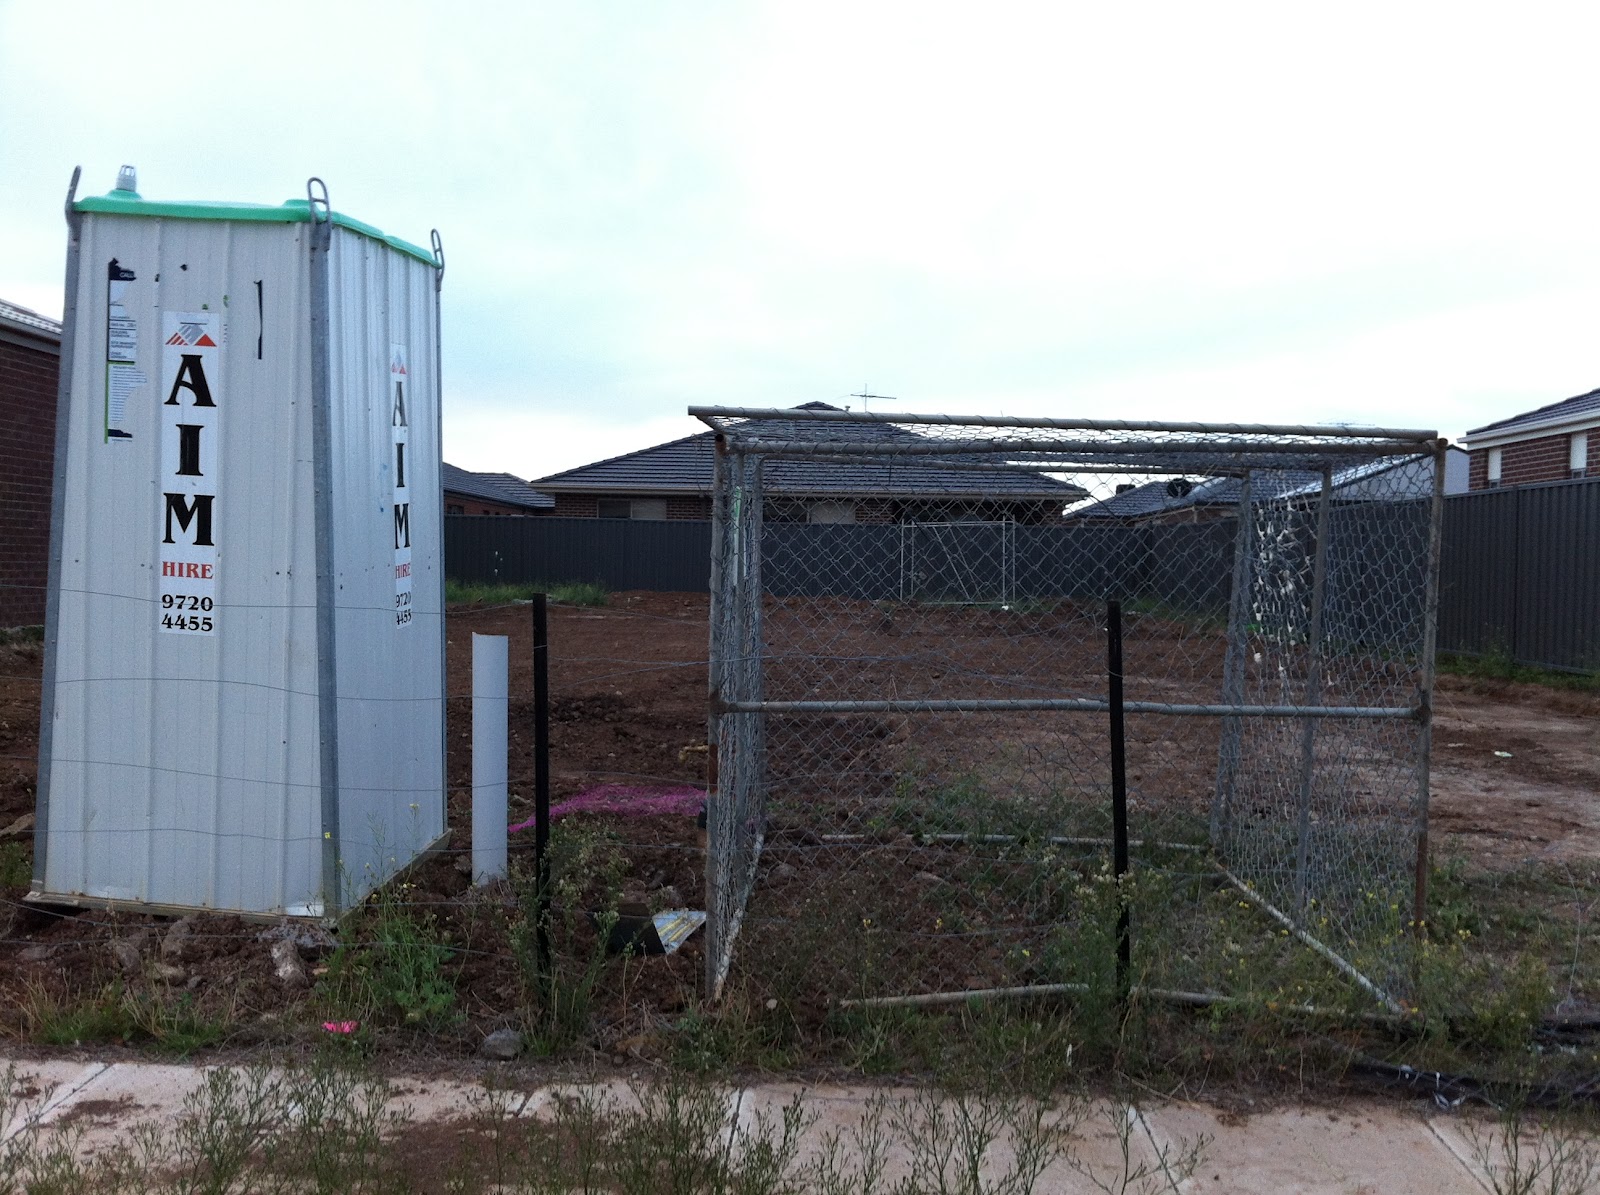
As promised, here are the updated progress of  my husband and I Tender appointment. Below are pics of  3 drill hole in our land, a sign that a soil test has been performed.


The soil report has indicated that we need to upgrade our standard SLAB from "M" class foundation to "H2" Class.
Excavation cost $6,369.00 
Slab Upgraded cost $8,387.00
Total site cost $14,756.00.
Plus Local Government & OH&S cost $645.00
This made our eyes 0.o WOW!!! 

One good thing did come out form this, our Lot (Area) was not affected by the Bushfire Assessment level. Therefore, no additional cost :)


Here are the list of structural upgrades: 
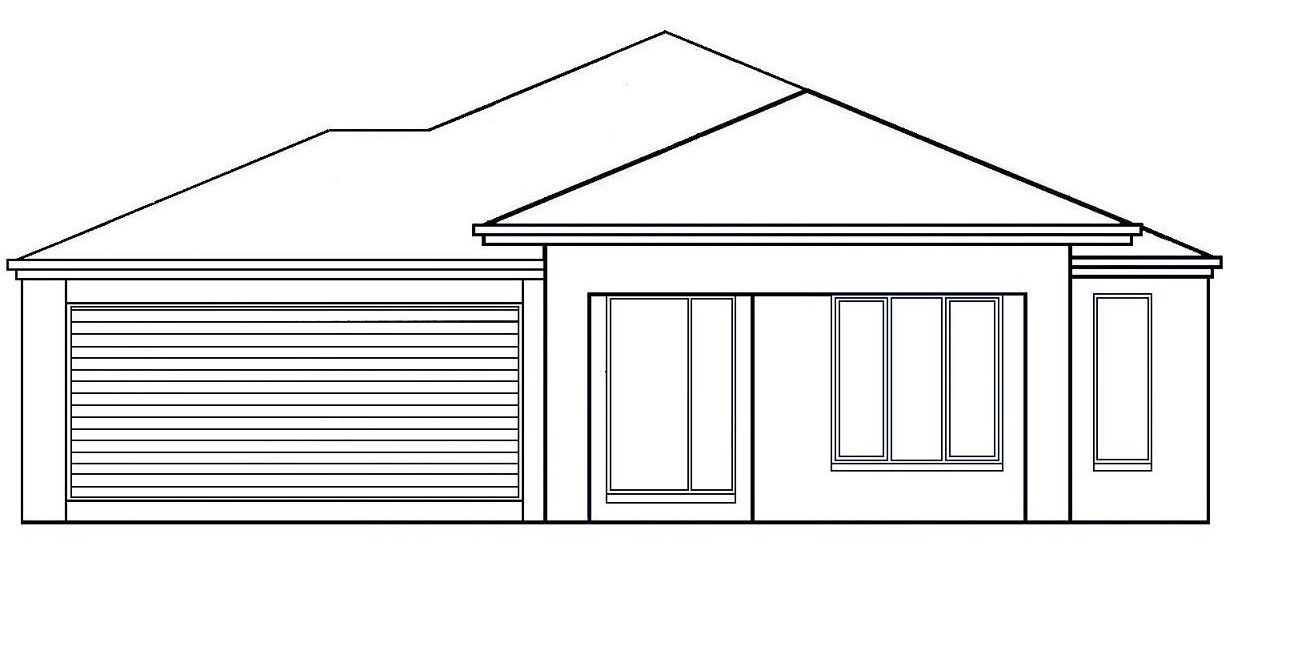
Facade - Oakland  $3,000
Evaporating cooling (Bonous Promotion) $999.00
Hinge door to master En-suite $184.00
Sliding Robes to children rooms.  Quantity - 3  $594.00
Our promotion included rendering to parts of the facade but we wanted our entire facade to be rendered. The additional cost for rendering the garage and some part of the master bedroom section  $1859.00 
Brick piers to Alfresco $220.00
Colorbond down pipes $684.00
Colorbond Roofing $4,298.00
Electrical - Telstra Underground Trench $462.00
Laundry- Extended Laundry benchtop $197.00
Upgraded the W.I.P:
  •  Base cabinets (total 5 No. doors) $1,022.00
  •  Overhead cabinets (total 5 No. doors) $988.00                                             
  •  Glass Splash back to full height to the pantry wall $497.00
  •  Ceaser Stone bench top 20mm $889.00 
Extended the Glass Splash back (in the kitchen)  to reach both side of the range hood. $456.00     
Upgraded our island bench to have stone waterfall return with 40mm edge $1515.00
Extended the height of overhead cabinets to Kitchen to 720mm  $252.00      
We also extended mirror across bathtub $173.00 and further extended mirror to full height of the bathroom wall $117.00.
        
Our Altered structural design:
Re-design Master bed room to include a flush wall to the front facade (making it square)  $282.00
Extended Dining and Family section to provide a square rear section of the home $2,864.00
Re-design floor plans to add a Study room $1,051.00

External Gas point $219.00
External Garden tap $141.00

External Cap hot water point  (alfresco area) $141.00
External Cap cold water point (fridge & alfresco area) $282.00

After the Tender appointment and paying the 3%, we felt so exhausted : / We cant believe we have spent so much at this point and we still have Tile, Colour and Electrical appointments coming.
LOL! If anyone thinks these upgrades above are ridiculous please let us know, as we still can rectify some of these upgrades.

Hrmmss... looking forward to the upcoming appointments :)

Cheers,

Wednesday 18 January 2012

Welcome :)


Hey Guys,

WELCOME to our my blog. 
My DH and I are currently in the process of building a Berkley 27 in Tarneit with PD.

This our first time building and we are new to this. We thought what a better way to share our building experience than creating a blog online.
We wanted to record each minor/significant step of the building process. We hope by sharing my experience in this blog will inspire, support and provide guidance to anyone who is interested in building with PD.

We will keep this BLOG regularly updated regarding the progress of each building stage. 

Upcoming Events!
Tender Appointment: 23/JAN/12 
Tile Appointment @ National Tiles: 31/Jan/12
Colour/Electrical Appointment @ Hopetoun: 13/Feb/12
Signing the Contract: 20/Feb/12 

Once available, We will be posting our altered floor plans and the brand new facade of Berkely 27. In addition we will post up our colour, electrical and tiles selection, including all the prices on each upgrade we have chosen.

Cheers,